SafeLink Phone Upgrade – 5 Tips You Need to Know

If you purchased a discounted phone or received a free one when you enrolled in the Lifeline Assistance program through SafeLink Wireless, you may wonder what it takes to upgrade your device.
Keep reading to learn everything there is to know about the SafeLink phone upgrade.
The SafeLink Free Wireless Program
SafeLink Wireless is a Lifeline service provider helping low-income American families pay for phone and internet services. The communications company also assists many eligible individuals with discounted or free government phones.
With the company’s free wireless program, low-income households can stay connected to the important people and things in their lives, including loved ones, job opportunities, emergency services, and educational services.
If you are a SafeLink Wireless subscriber, we suggest paying close attention to the following tips if you want to upgrade your free SafeLink phone.
5 Tips for SafeLink Phone Upgrade
1. You Have Options
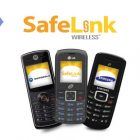
You don’t have to carry an old-fashioned phone around just because you are a Lifeline program beneficiary. SafeLink gives you a variety of phone models to choose from, and you can even upgrade your basic cell phone to an Android or Apple iPhone.
When upgrading your SafeLink phone, some of the available models include:
- Motorola G Power (2021)
- Google Pixel 6 Pro 5G
- Nokia G50
- Samsung Galaxy S9
- Samsung Galaxy Note 10+
- Apple iPhone 6S Plus
- Apple iPhone 7 Plus
- Apple iPhone XR
- Apple iPhone 11
- Apple iPhone 13
Keep in mind that these phones are not free, even for low-income consumers participating in the Lifeline Assistance program and the Affordable Connectivity Program (ACP). Upgrading your SafeLink phone means you have to purchase a new device from the company.
2. You Can Pay in Installments
Understandably, some SafeLink phone models are expensive and may not be within the budget of low-income consumers.
But while a SafeLink phone upgrade isn’t free, you don’t have to break the bank to change your device. The phones are available at discounted prices for eligible Lifeline and ACP consumer household.
But there’s more good news. To make payment much easier, SafeLink allows eligible subscribers to pay for their preferred phones in installments. Moreover, the payments are interest-free, so you won’t be paying more than the phone’s actual price.
For example, you can upgrade your free SafeLink basic cell phone to an Apple iPhone 7 Plus and make four interest-free payments of $50.
This means you don’t have to settle for a model you don’t really like just to save some cash. Simply choose a phone that suits your needs and spread the payment over an agreed timeframe.
3. You Don’t Have to Buy a Phone From SafeLink Shop
With SafeLink Wireless, subscribers are not restricted to using only devices provided by the company. You may have received a free phone from SafeLink but want to upgrade to a model that’s unavailable on the company’s website. In that case, you can get your preferred phone model from elsewhere and still receive free or discounted Lifeline service.
This option is known as the Bring Your Own Phone (BYOP) plan. SafeLink will mail you a SIM kit free of charge if you qualify for Lifeline service. In some cases, you may have to purchase the provider’s SIM kit and transfer your SafeLink benefits.
Keep the following in mind if you choose to bring your device:
- Select the “Bring Your Own” option during the SafeLink phone upgrade process.
- Your phone must be GSM-compatible.
- The phone must be unlocked.
4. Activating Your New Phone Is Easy
After upgrading your SafeLink phone, you must activate the device to receive SafeLink benefits.
To activate your new phone or SIM card (if you choose to bring your own phone):
- From your old SafeLink phone, text “ONESTEP” to 611611.
- Provide the last four digits of the new device serial number or new SIM card number.
- You will receive instructions on activating your new phone or SIM card and transferring your SafeLink benefits.
5. It’s Easy to Transfer Your Contacts
You don’t have to lose your contacts just because you upgraded your phone. Here’s how to transfer your contacts to your new phone in three simple steps:
- Make sure your contacts are stored on your old phone’s memory. If they are not, save them to your device memory.
- Carefully remove your SIM card from the old phone and insert it in the new phone.
- Save the contacts from the SIM card onto the memory of the new phone.
Another way to transfer your contacts from your old device is by downloading the Transfer Wizard app for free on Google Play. The app can help you easily transfer your contacts from your old phone to the new one.